

I remember standing near the Lamar Valley trailhead at 6:30 AM on a Tuesday in mid-September. My thermometer read 26 degrees Fahrenheit. By 1:00 PM that same day, I was sitting on a log near Specimen Ridge, sweating in a short-sleeved shirt as the mercury hit 72. This 45-degree swing is not an anomaly; it is the standard operating procedure for the Greater Yellowstone Ecosystem during the shoulder season. If you pack for the weather you see on the forecast today, you will be miserable by tomorrow. September in the park is a beautiful, volatile beast that demands a technical approach to your suitcase.
Managing Temperature Swings: The Layering Strategy That Actually Works
The biggest mistake I see visitors make is bringing one massive heavy coat and thinking they are set for the cold. You aren’t. When you are hiking the Grand Canyon of the Yellowstone, you will overheat in a heavy parka within twenty minutes. Conversely, a light fleece won’t save you when the wind whips across Yellowstone Lake. You need a three-layer system that you can peel off and put back on like an onion. This is the only way to stay comfortable when the sun hides behind a cloud and drops the temperature ten degrees in an instant.
The Base Layer: Moisture Management
Your base layer is the most important piece of clothing you will pack. Its job isn’t to keep you warm—it is to keep you dry. If you sweat while walking and that moisture stays against your skin, you will catch a chill the moment you stop to look at a grizzly through your binoculars. I have entirely moved away from synthetic base layers in favor of Merino wool. It doesn’t retain odors, which is a blessing when you’re spending four days in a camper van or a small cabin at Canyon Lodge.
For a September trip, I recommend the Smartwool Classic Thermal Merino Base Layer (approximately $115).
Specs: 100% Merino wool, 250g/m² fabric weight, slim fit.
Pros: Exceptional temperature regulation and naturally antimicrobial.
Cons: Expensive and requires careful laundering to avoid shrinking.
The Mid-Layer: Trapping Heat
This is your insulation. It should be lightweight but effective at trapping body heat. I usually carry two different mid-layers: a lightweight fleece and a packable down or synthetic “puffy” jacket. The puffy is your insurance policy. In September, you might even see a dusting of snow at higher elevations like Dunraven Pass. The goal is a high warmth-to-weight ratio so you aren’t bogged down during steep ascents.
My go-to for years has been the Patagonia Nano Puff Jacket (approximately $239).
Specs: 60-g PrimaLoft Gold Insulation Eco, 100% recycled shell fabric, DWR finish.
Pros: Highly compressible (packs into its own pocket) and stays warm even if it gets damp.
Cons: The shell fabric is somewhat delicate and can snag on stray branches if you’re bushwhacking.
The Outer Shell: Wind and Rain Protection
September is drier than June, but afternoon thunderstorms are common. More importantly, the wind in Yellowstone can be relentless, especially near the geyser basins where there is little tree cover. Your outer shell needs to be a dedicated rain jacket that acts as a windbreaker. Don’t bother with a heavy “3-in-1” jacket; they are too bulky for active hiking. Look for something with pit zips to allow for ventilation when the rain is falling but the air is still humid.
A top-tier choice is the Arc’teryx Beta LT Jacket (approximately $450).
Specs: GORE-TEX 3L construction, bluesign approved materials, weight 13.9 oz.
Pros: Completely waterproof and windproof with incredible durability.
Cons: Extremely high price point and the fabric can be “crinkly” and loud when you move.
| Layer Type | Recommended Material | Primary Function |
|---|---|---|
| Base Layer | Merino Wool (150-250 gsm) | Wicking moisture and odor control |
| Mid-Layer | Synthetic Down or Grid Fleece | Insulation and heat retention |
| Outer Shell | Gore-Tex or proprietary waterproof membrane | Wind and rain protection |
Footwear and Socks: Protecting Your Feet on Geothermal Trails
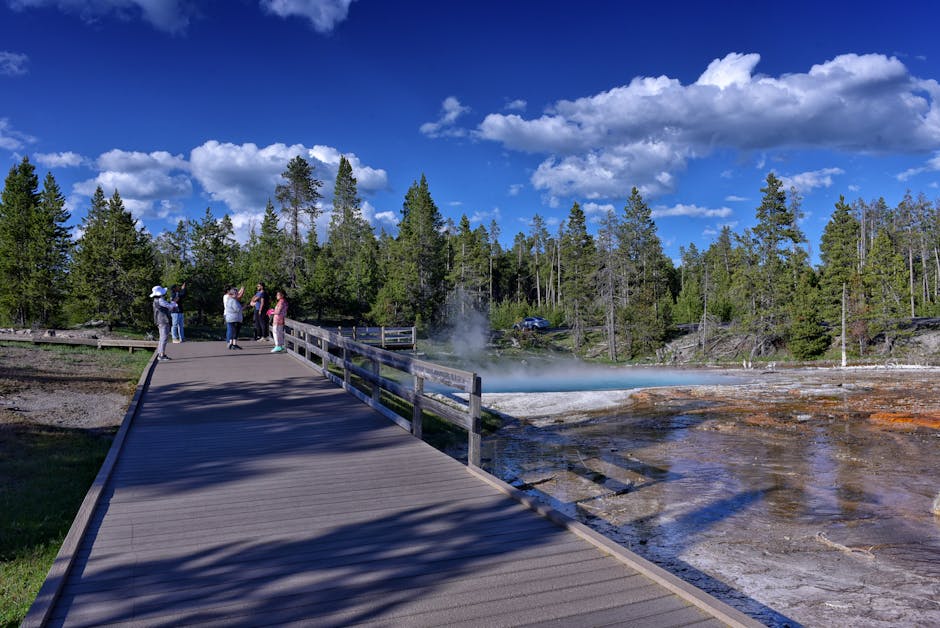
Yellowstone’s terrain is deceptive. You might spend the morning on the perfectly flat, recycled-plastic boardwalks of the Upper Geyser Basin and the afternoon navigating the rocky, uneven terrain of the Mount Washburn trail. Your footwear needs to handle both. I’ve seen people try to do the park in fashion sneakers, and by day three, they are nursing blisters and sore arches because the volcanic rock is unforgiving.
The Case for Mid-Height Hiking Boots
While trail runners are popular, I still prefer a mid-height boot for September. The extra ankle support is helpful when you’re tired and navigating the roots and rocks of the northern range. Furthermore, early morning dew in the tall grass of the valleys will soak through non-waterproof mesh shoes in seconds. A waterproof boot keeps your feet dry during those chilly, damp starts and provides a barrier against the occasionally muddy trails found near the lake.
I personally use the Salomon Quest 4 Gore-Tex (approximately $230).
Specs: Contagrip TD sole, GORE-TEX membrane, 4D Advanced Chassis.
Pros: Incredible stability and a very aggressive tread pattern for muddy slopes.
Cons: They are heavy and can feel like overkill if you are only doing boardwalk walks.
The Importance of Technical Socks
Do not wear cotton socks. I cannot stress this enough. Cotton absorbs moisture, loses its shape, and creates friction—the perfect recipe for blisters. You want a wool-blend sock with targeted cushioning. I’ve found that a medium-weight sock provides enough warmth for those 30-degree mornings without making my feet swampy when the sun comes out. Technical socks also provide arch support that helps reduce foot fatigue over long mileage.
The industry standard for a reason is the Darn Tough Hiker Micro Crew Cushion (approximately $25).
Specs: 59% Merino Wool, 39% Nylon, 2% Lycra Spandex.
Pros: They feature a lifetime warranty and high-density knit that doesn’t bunch up.
Cons: The fit is quite snug, which some people find restrictive.
Pro Tip: If you are prone to blisters, bring a small roll of Leukotape. Unlike moleskin or Band-Aids, Leukotape actually stays stuck to your skin even when you sweat, providing a permanent barrier against friction.
The Daypack: Choosing a Vessel for Your Gear
In September, your pack needs to be larger than a standard summer bag because you will be carrying so many shed layers. A 20 to 30-liter pack is the “Goldilocks” size for Yellowstone. It needs to have a dedicated spot for bear spray and easy access to water. If your pack doesn’t have a rain cover, buy one separately; a soaked pack can add several pounds of water weight and ruin your electronics.
I recommend the Osprey Stratos 24 (approximately $180).
Specs: AirSpeed suspension system, 24L capacity, integrated rain cover.
Pros: The suspended mesh back panel provides incredible airflow, preventing “sweaty back” syndrome.
Cons: The internal frame makes it difficult to shove into small overhead bins on regional planes.
Wildlife Observation and Safety Gear: Tools for the Rut
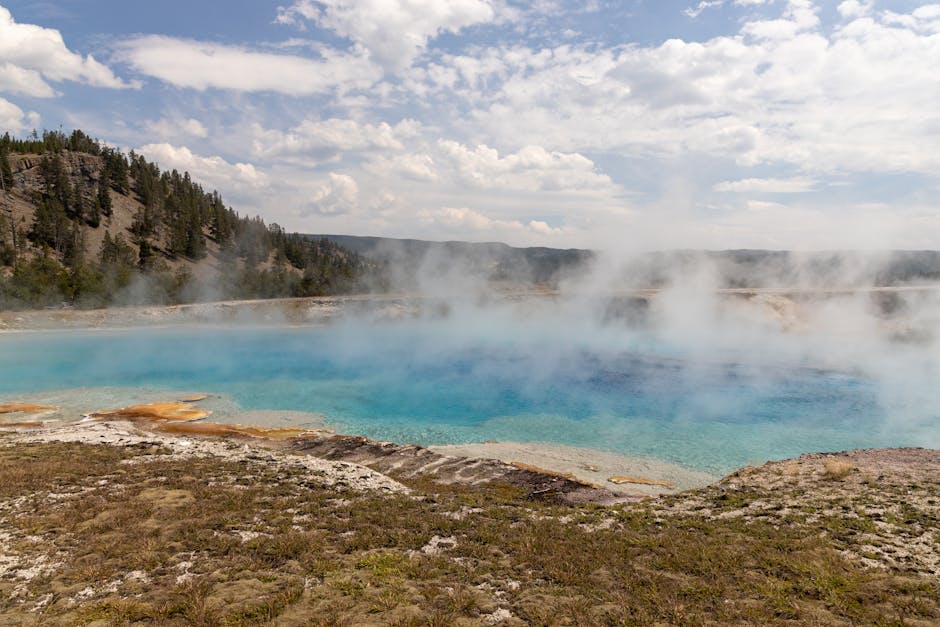
September is arguably the best month for wildlife in Yellowstone. The elk rut is in full swing, meaning the bulls are bugling and aggressive. Bears are in hyperphagia, eating as much as possible before hibernation. This means you are more likely to see them, but it also means you must be more vigilant about your safety. You aren’t just a tourist in September; you are a guest in a very active wild habitat.
Bear Spray: Non-Negotiable
If you plan on stepping even ten feet off the pavement, you need bear spray. Carrying it in your backpack is useless; it must be on a holster on your belt or chest strap. I’ve had to reach for mine once near Mammoth Hot Springs when a black bear emerged from a thicket. Thankfully, I didn’t have to use it, but having it accessible saved me from a panic attack. Remember that you cannot fly with bear spray. Plan to buy it at a shop in Gardiner or West Yellowstone, or rent it from the kiosks at the park entrances.
I recommend Counter Assault Bear Spray (approximately $50).
Specs: 10.2 oz canister, 32-foot range, 7 seconds of spray time.
Pros: It has the longest spray distance on the market and a high-volume output.
Cons: The safety clip can be difficult to remove if you don’t practice with an inert canister first.
Optics: Don’t Rely on Your Phone
The wolves and grizzly bears in the Lamar and Hayden Valleys are often hundreds of yards away. Your iPhone zoom will produce nothing but a blurry brown smudge. A decent pair of binoculars will change your entire experience. I used to think I didn’t need them until I spent an hour watching a wolf pack interact through a high-quality lens. It turned a “sighting” into a story.
For a balance of price and performance, look at the Vortex Diamondback HD 10×42 (approximately $230).
Specs: 10x magnification, 42mm objective lens, phase correction coating.
Pros: Excellent low-light performance (crucial for dawn/dusk viewing) and a rugged build.
Cons: At 21 ounces, they can feel heavy around your neck after a few hours of hiking.
Wildlife Safety Steps
- Maintain a distance of at least 100 yards from bears and wolves.
- Maintain a distance of at least 25 yards from all other wildlife, including bison and elk.
- Make noise while hiking in wooded areas to avoid surprising a bear.
- Always hike in groups of three or more when in the backcountry.
- Never approach an elk during the rut; bulls can charge vehicles and humans without warning.
Essential Accessories and Electronics: Powering Your Trip
Yellowstone is a high-altitude plateau. The air is thin, the sun is intense, and the lack of humidity will dehydrate you faster than you realize. Beyond clothing and safety gear, there are several small items that can make or break your comfort levels during a long day of exploring the geothermal features. Power management is particularly tricky because the cold drains lithium batteries rapidly.
Hydration and Sun Protection
Even if it feels cool, the UV index in Yellowstone is high. I have seen people get nasty sunburns on overcast days in September because they forgot they were at 7,000 feet. You also need to drink significantly more water than you do at sea level to combat altitude sickness. I prefer a hard-sided bottle over a reservoir because the reservoirs can be a pain to clean and are prone to leaking in your pack if they get squeezed.
The Nalgene 32oz Wide Mouth (approximately $16) is still the king.
Specs: BPA-free Tritan, 32 oz capacity, fits most filtration devices.
Pros: Virtually indestructible and fits most water filtration adapters.
Cons: Doesn’t keep water cold like a vacuum-insulated bottle would.
Power Management and Navigation
Cold weather kills battery life. If you are using your phone for navigation (via downloaded offline maps like Gaia GPS or AllTrails, as there is almost no cell service in the park interior), you will find your battery draining 30-40% faster than usual. A portable power bank is a necessity, not a luxury. I suggest something with at least a 10,000mAh capacity to ensure you can charge your phone and your camera batteries if needed.
The Anker 533 Power Bank (approximately $50) is a solid choice.
Specs: 10,000mAh capacity, 30W high-speed charging, digital display.
Pros: Fast charging and compact enough to fit in a jacket pocket.
Cons: Takes a long time to recharge the bank itself once it’s empty (about 4 hours).
Common Packing Pitfalls to Avoid
After years of visiting the park, I’ve noticed several recurring mistakes that travelers make when packing for September. Avoiding these will save you space and frustration.
- Overpacking “City” Clothes: Yellowstone is extremely casual. Even the nicest dining rooms in the park (like the Lake Yellowstone Hotel) do not require a suit or formal dress. Jeans and a nice sweater or fleece are perfectly acceptable.
- Forgetting Lip Balm and Lotion: The humidity in September can drop into the single digits. Your skin will crack and your lips will bleed if you don’t bring heavy-duty moisturizer and SPF lip balm.
- Bringing a Heavy Tripod: Unless you are a professional photographer, a heavy tripod is a burden. If you need stability for your binoculars or camera, consider a lightweight monopod or a window mount for your car.
- Relying on “Water-Resistant” Gear: In a Yellowstone downpour, water-resistant is just another word for “eventually soaked.” Ensure your outer shell and boots are truly waterproof.
Packing for Yellowstone in September is about preparing for the extremes. You are packing for a summer afternoon, a winter morning, and a rainy spring day all at once. By focusing on high-quality layers and specific safety gear like bear spray and optics, you move from being a frustrated tourist to an equipped explorer. The park is quieter this time of year, the colors are changing to gold and orange, and the animals are active. If your gear is right, you can actually focus on the landscape instead of your cold toes or your sunburned nose. The effort you put into your suitcase now will pay dividends when you are standing in the silence of the Hayden Valley, watching the mist rise off the river while a wolf howls in the distance.